Table of Contents
Overview
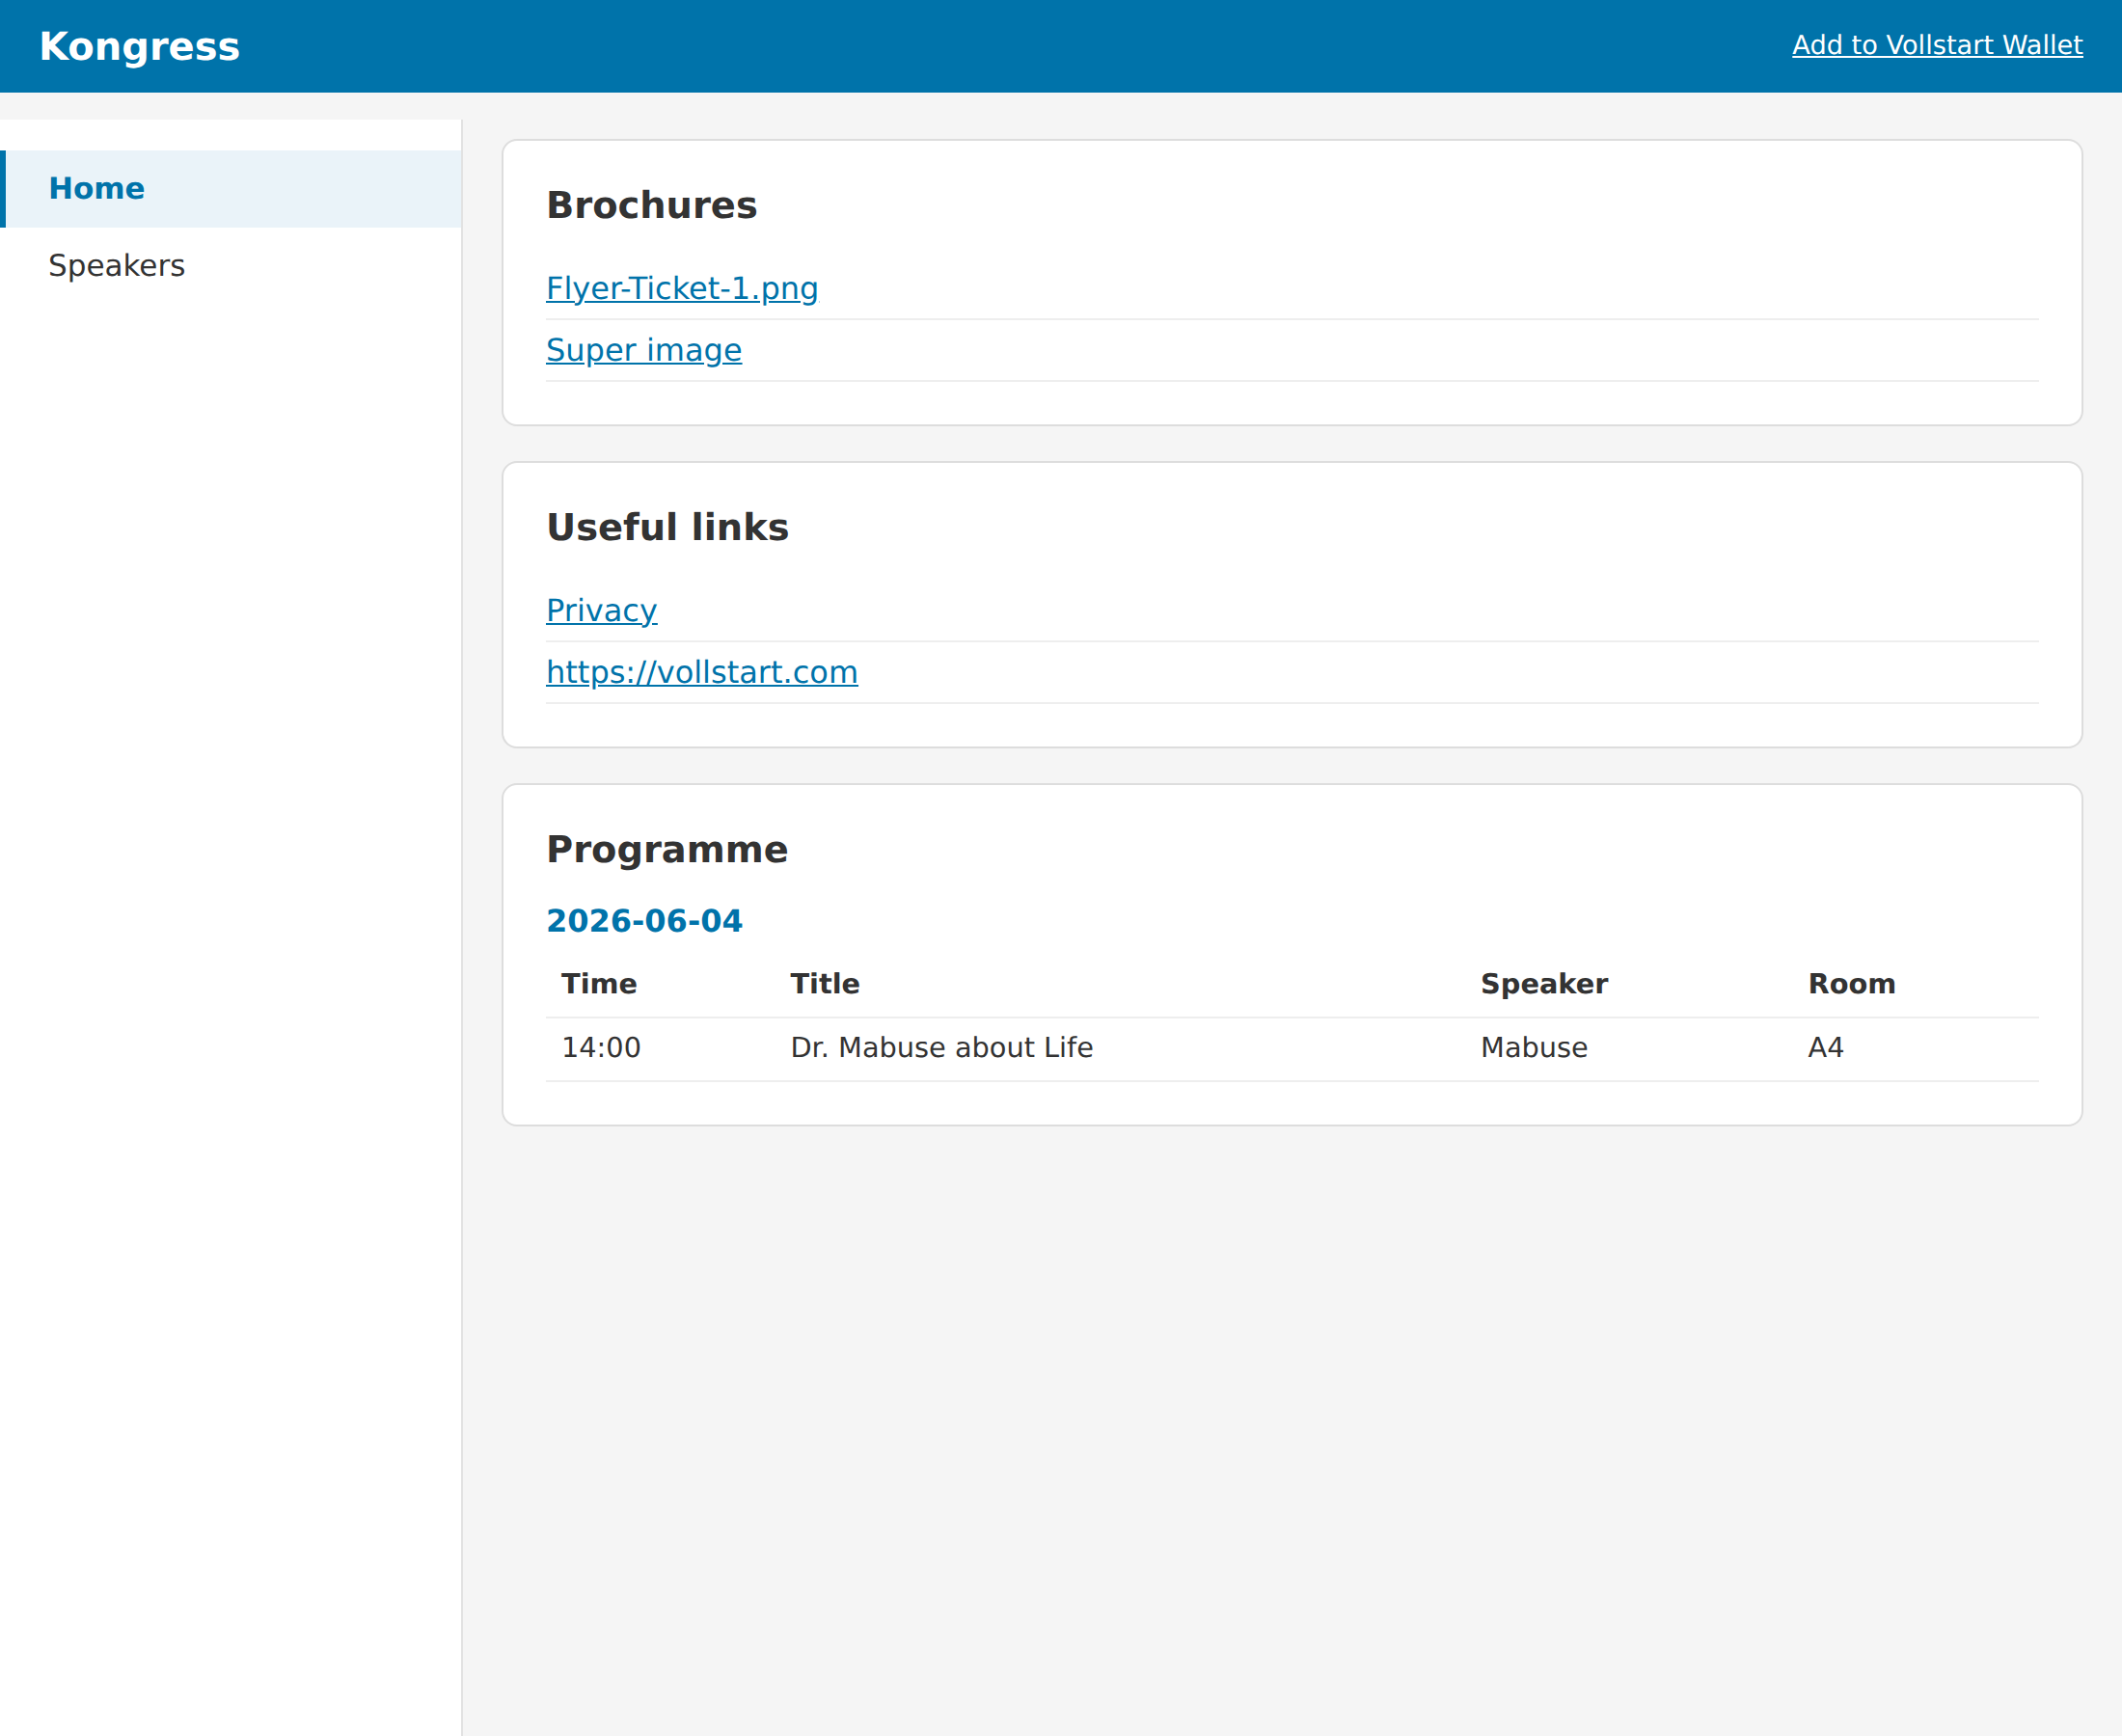
The Congress tool lets you attach a rich, structured information portal to your events — organised into pages (a start page plus as many pages as you need) that hold content sections: programme schedules, downloads, links, images, embedded videos and free text. Ticket holders open the congress page with their ticket and always have the latest details at hand, even offline.
- Build a congress once and assign it to one or more WooCommerce products.
- Group content into pages shown as a sidebar (desktop) or hamburger menu (mobile); the start page loads instantly and other pages load on demand.
- Each page holds sections with their own type (Info, Programme, Download, URL, Image, Video, Gallery, Custom).
- Optionally protect individual sections with a password.
- Control when the page opens and how long it stays available, or duplicate a congress as a "new edition" for recurring events.
- The congress page works offline and can be installed as a mini Progressive Web App (PWA).
Creating a Congress
- In your WordPress admin, open Event Tickets → Congresses.
- Click New congress.
- Enter a Title. The Slug is a unique identifier — it is generated automatically and you can override it. Visitors do not need the slug; they open the page through their ticket link.
- Optionally set an Event start and Event end time. Together with the global access settings these control how many hours before the start the page opens and how many days after the end it stays available.
- Optionally set an Access expires date for a manual hard cut-off. Leave it empty for unlimited access.
- Click Save congress. After saving you can add pages and sections.
Pages & Navigation
Content is organised into pages. The first page is the start page — it is shown first and loads immediately when a visitor opens the congress. Visitors switch pages from a sidebar on desktop or a hamburger menu on mobile; each additional page is fetched only when opened, so even congresses with dozens of speakers stay fast.
- In the congress editor, use Add page to create pages, then drag them to reorder — the first one is always the start page.
- Rename or delete a page at any time; deleting a page moves its sections to the start page.
- Add sections to a page with Add section. In the section dialog you can also assign a section to a different page to move it there.
- Sections are drag-sortable within their page.
Section Types
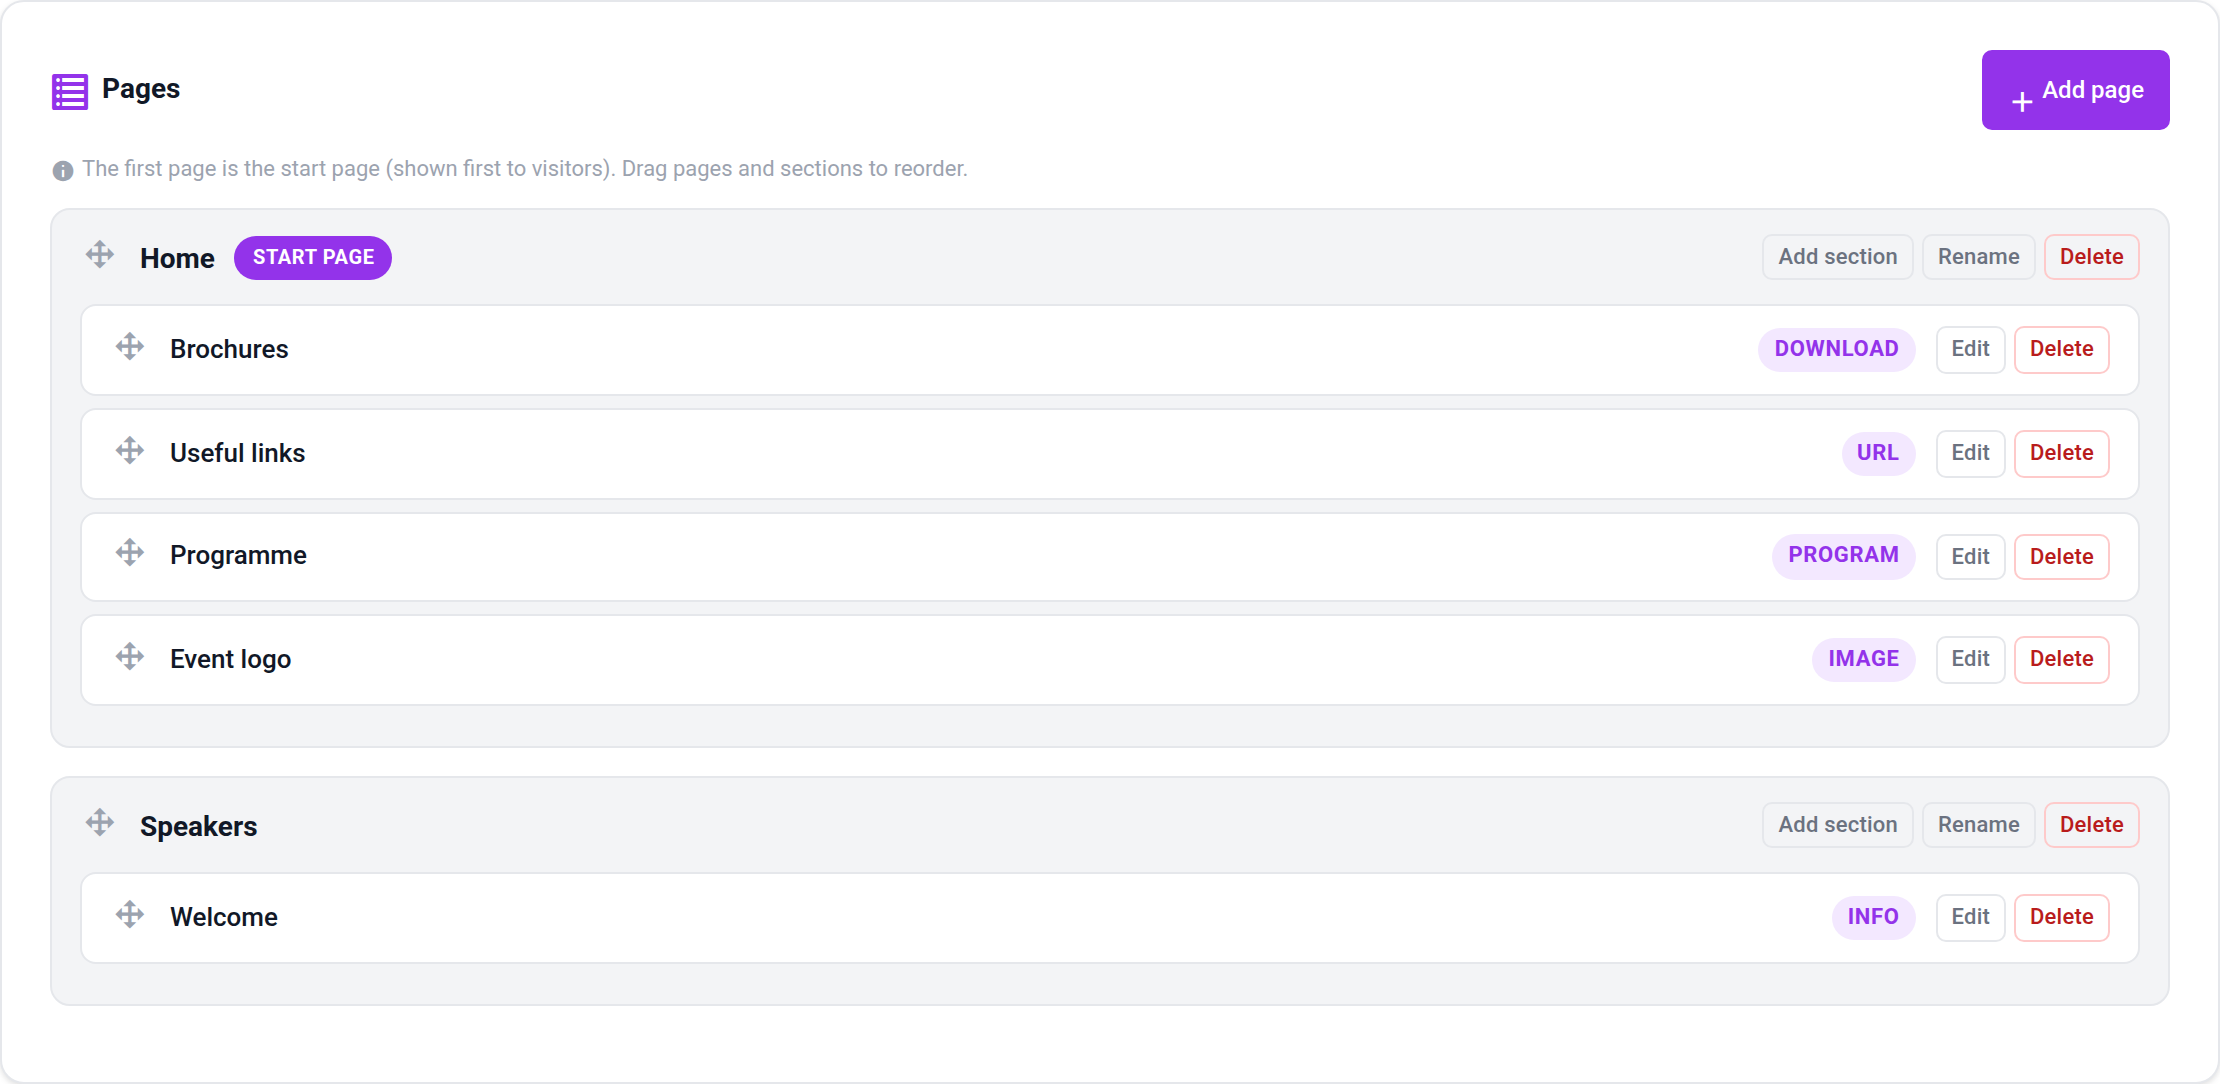
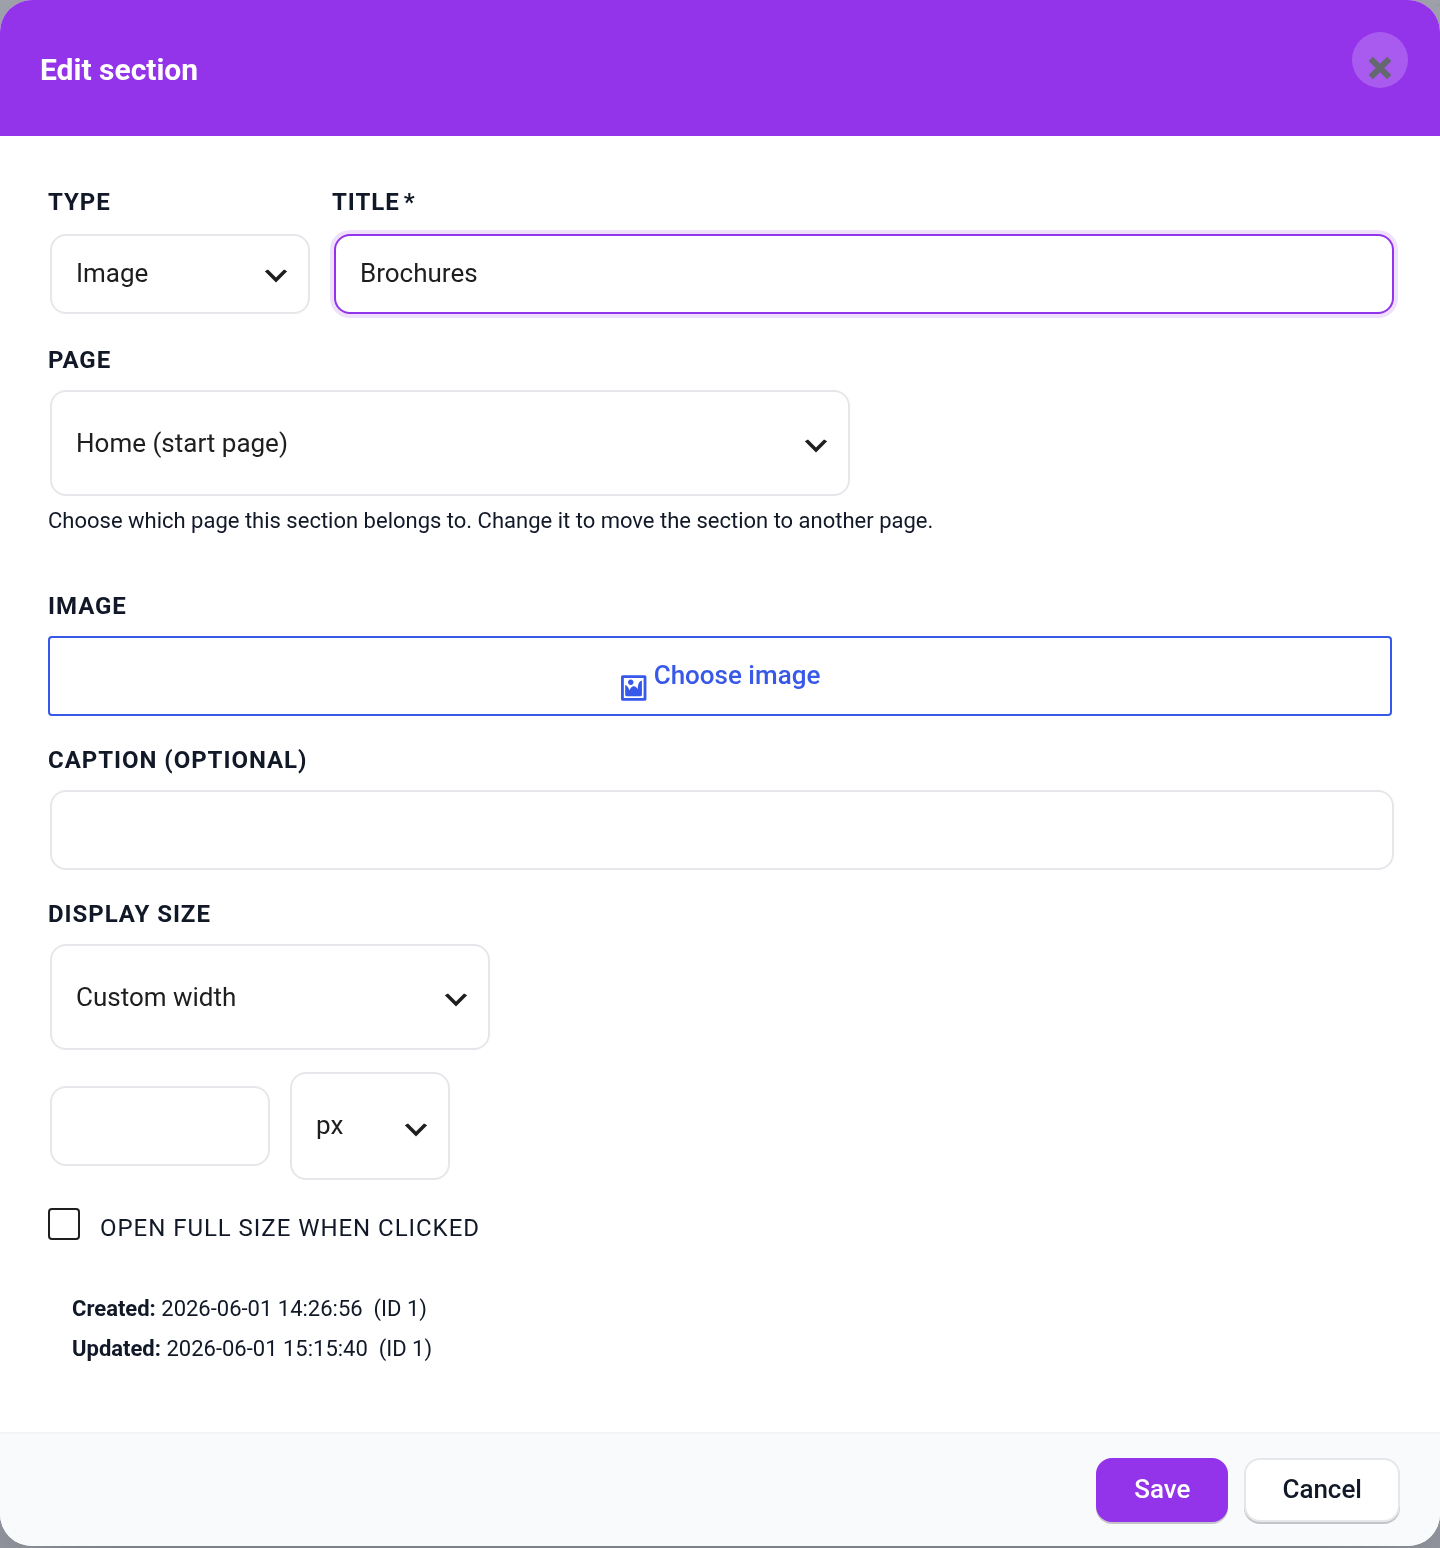
Each section lives on a page and has a type that determines its input mask and how it is displayed to ticket holders:
- Info / Custom — free rich text written in a visual editor. HTML is allowed; scripts are stripped for security.
- Programme — a schedule organised by days, each with time slots (time, title, speaker, room).
- Download — files from the media library, each with a visitor-facing label. Per file you can choose to open inline (PDFs and images open in the browser) or force a download.
- URL — a list of labelled links; mark a link internal to open it in the same tab.
- Image — a single image from the media library with an optional caption. Choose its display size (full width, original, or a custom width in px/%) and optionally let it open full size in a lightbox when clicked.
- Video — paste a YouTube/Vimeo link for automatic embedding, or upload a video file from the media library.
- Gallery — multiple images, each with an optional caption.
Sections and list items (files, links, images, programme slots) can be reordered by drag & drop, and each section can optionally be protected with a password.
Assigning a Congress to a Product
A congress becomes visible to customers once it is linked to a product:
- Edit the WooCommerce product in Products.
- Open the Event Tickets product settings and choose the congress to assign.
- Save the product.
One congress can be shared across multiple products — ideal when several ticket types belong to the same event.
How Ticket Holders Access the Congress
After purchase, the ticket holder reaches the congress page using their ticket ID. Like the ticket detail and scanner pages it is served from the plugin path — …/ticket/{ticket-id}?congress (with a query fallback …/?code={ticket-id}&congress) — so it works in compatibility mode and never clashes with your shop’s page slugs.
Access is checked on every request: the ticket must exist, belong to a product the congress is assigned to, and the order must not be refunded or cancelled. The event-relative window (hours before the start / days after the end) and any access-expiry date are enforced here too.
You can also surface the link automatically: enable the order-email link option, and — if you use the Vollstart Wallet — a "Go to congress" button appears on the ticket whenever its product is linked to an active congress.
Recurring Events & New Editions
For an event that repeats (e.g. an annual congress), use the New edition button in the congress list. It duplicates the congress under a new slug and automatically sets an expiry date on the original, so last year’s attendees keep their archived version while new tickets point to the current edition.
Offline Access & App Installation
The congress page ships with a Web App Manifest, so visitors can install it to their home screen as a mini app. Content is cached for offline reading, and the browser is told to revalidate via ETag/Last-Modified so updates are picked up automatically when back online.