Automatically block seats while customers complete their purchase
Display seat information on PDF tickets and in emails
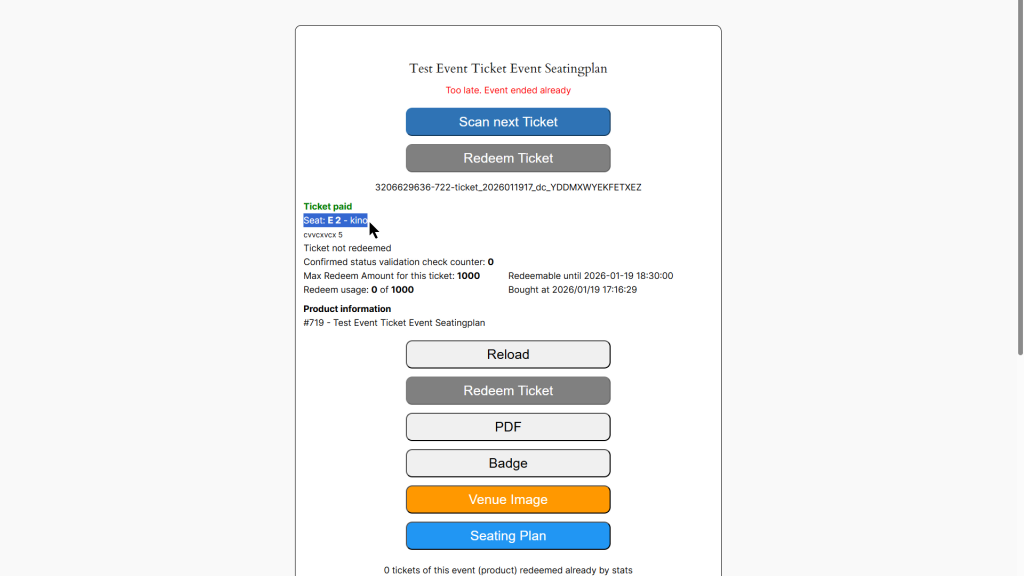
See seat assignments in the ticket scanner
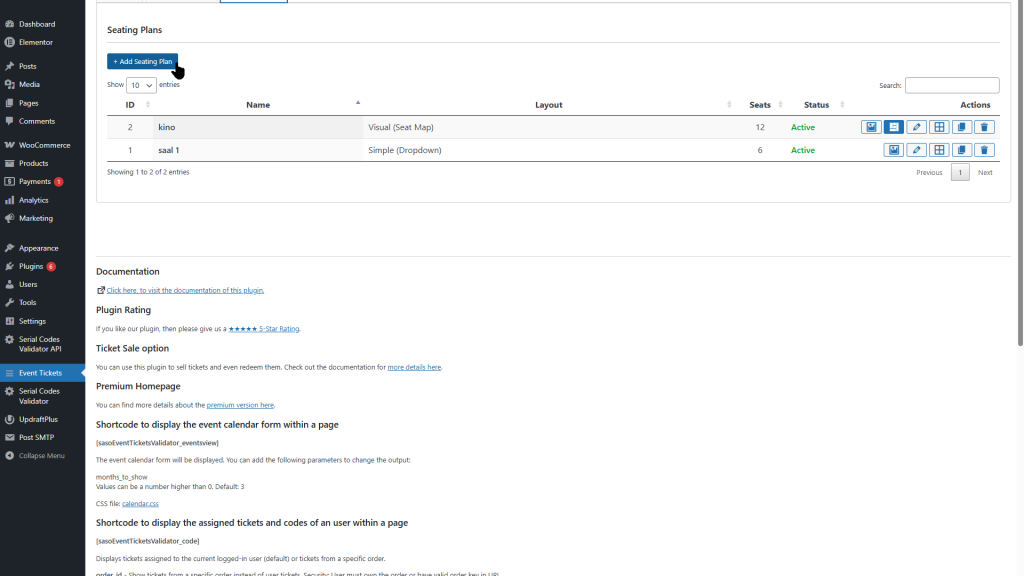
Creating a Seating Plan
Step 1: Navigate to Seating Plans
Go to WordPress Admin → Event Tickets
Click on the Seating Plans tab
Step 2: Add New Seating Plan
Click Add New Seating Plan
Enter a Name for your seating plan (e.g., “Main Hall”, “Theater Room”)
Optionally add a Description
Choose the Layout Type:
Simple – Basic list of seats (no visual layout)
Visual – Interactive drag & drop designer
Simple vs Visual Mode
Simple Mode
Best for:
Small venues with few seats
Quick setup
When visual layout isn’t needed
In Simple Mode, you define seats as a list:
| Identifier | Category | Description |
|————|———-|————-|
| A-1 | Standard | Row A, Seat 1 |
| A-2 | Standard | Row A, Seat 2 |
| VIP-1 | VIP | VIP Box 1 |
Visual Mode
Best for:
Complex venue layouts
When customers need to see the actual arrangement
Events where seat location matters (concerts, theaters)
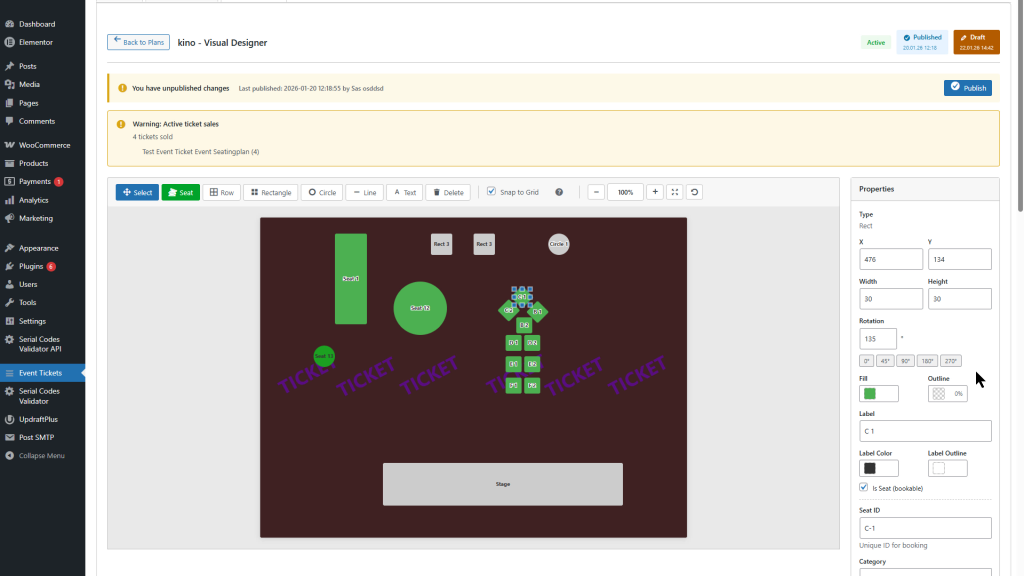
Visual Mode provides a full drag & drop designer to create your venue layout.
Visual Designer
The Visual Designer allows you to create an interactive seating plan.
Toolbar
| Tool | Description |
|——|————-|
| Select | Select and move elements |
| Rectangle | Add rectangular seat or decoration |
| Circle | Add circular seat or decoration |
| Line | Add lines for aisles, walls, boundaries |
| Text | Add text labels |
| Delete | Remove selected element |
Adding Seats
Select Rectangle or Circle tool
Click on the canvas to place the element
In the Properties panel:
Check “Is Seat” to make it bookable
Enter Identifier (e.g., “A-1”)
Select Category (for pricing tiers)
Add optional Description
Adding Decorations
For non-bookable elements (stage, aisles, labels):
Add a shape or text
Leave “Is Seat” unchecked
Style as needed (color, size)
Background Image
Upload a venue floor plan as background:
Click Background Settings
Upload image from Media Library
Adjust canvas size to match
Bulk Add Seats
For rows of seats:
Click Bulk Add
Choose pattern (Row, Grid)
Set starting identifier (e.g., “A-1”)
Set count and spacing
Draft / Published Workflow
The designer uses a draft/publish workflow to protect live events:
Draft: Your working version (not visible to customers)
Published: What customers see
Important: Changes only become visible after clicking Publish. This allows you to edit seating plans safely while tickets are being sold.
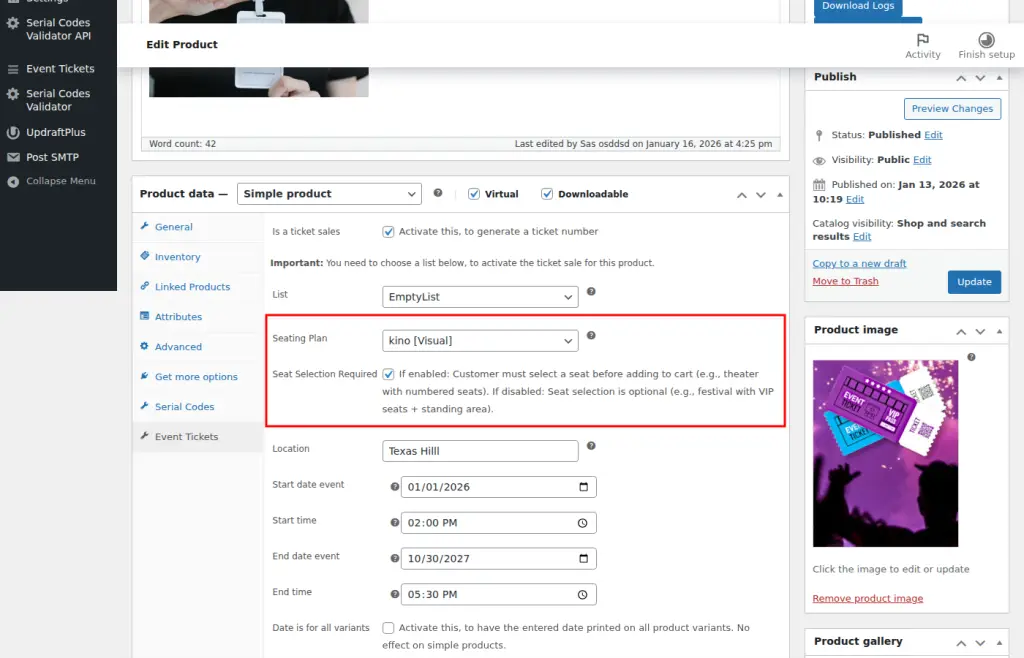
Assigning Seating Plans to Products
Step 1: Edit WooCommerce Product
Go to Products → Edit your ticket product
Scroll to Product Data section
Click the Event Tickets tab
Step 2: Enable Seating Plan
Check “Enable Seating Plan”
Select your seating plan from the dropdown
Save the product
Options
| Option | Description |
|——–|————-|
| Seating Plan | Select which plan to use |
| Required | Customer must select a seat |
| Show on Product Page | Display seat selector on product detail |
| Show on Shop Page | Display seat selector on archive/shop pages |
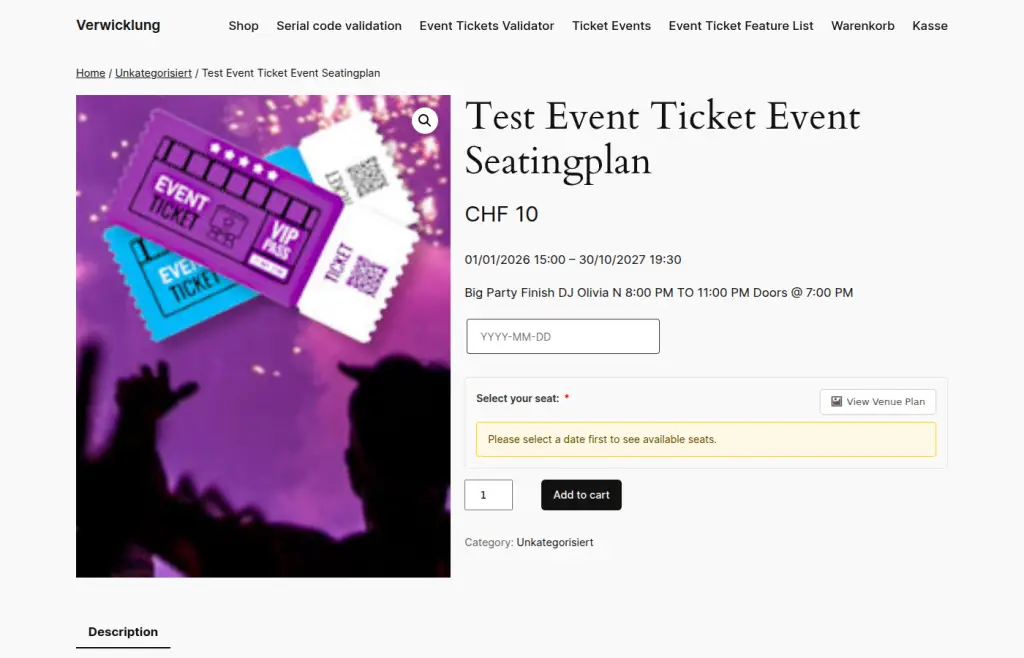
Customer Experience
On Product Page
When a customer views a product with seating:
They see the seating plan visualization
Available seats are shown in green
Booked/reserved seats are shown in red/yellow
Clicking a seat selects it (shown in blue)
Seat Blocking
When a customer selects a seat:
Seat is temporarily blocked (reserved)
Block lasts for configurable time (default: 15 minutes)
If customer doesn’t complete purchase, seat becomes available again
Block is confirmed when order is placed
On Checkout
Product: Concert Ticket
Seat: Row A, Seat 5 (Standard)
Price: CHF 50.00
In Emails
Order confirmation emails include seat information:
Your Ticket Details:
- Ticket Number: ABC-12345
- Event: Concert 2026
- Seat: Row A, Seat 5
On PDF Ticket
The PDF ticket displays:
Seat identifier (e.g., “A-5”)
Category (e.g., “VIP”, “Standard”)
Optional: Seat description
Ticket Scanner Integration
When scanning tickets, the seat information is displayed:
Scanner Display
✓ VALID TICKET
Ticket: ABC-12345
Product: Concert VIP Pass
Seat: VIP-3 (VIP Area)
Customer: John Doe
[Redeem]
FAQ
Can I edit a seating plan after tickets are sold?
Yes, but with restrictions:
You can add new seats
You can move existing seats
You cannot delete seats that have sold tickets
The draft/publish workflow protects your customers.
What happens if a customer abandons their cart?
The seat block expires after the configured timeout (default: 15 minutes) and the seat becomes available again.
Can I have different prices per seat category?
Currently, seat categories are for display purposes only (labeling seats as “VIP”, “Standard”, etc.). Automatic price differentiation by category is not yet supported.
Workaround options:
Create separate simple products for each category, each with its own seating plan
Use WooCommerce product variations with different seating plans assigned to each variation
Note: This is a planned feature for future releases.
How do I refund a ticket with a seat?
When an order is refunded/cancelled:
The ticket is invalidated
The seat is automatically released
The seat becomes available for new purchases
Can customers change their seat after purchase?
Not automatically. To change a seat:
Admin refunds original ticket
Customer purchases new ticket with desired seat
Or: Admin manually reassigns seat in the backend (future feature).
Wir speichern Cookies auf Ihrem Computer, um Ihr Website-Erlebnis zu optimieren. Sowohl auf dieser Website als auch auf anderen Medienkanälen. Mehr erfahren dazu finden Sie in unserer Datenschutzrichtlinie.
Du kannst deine Zustimmung jederzeit widerrufen, indem du den den Button „Zustimmung widerrufen“ klickst.